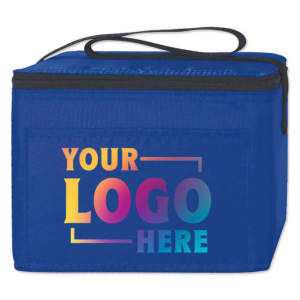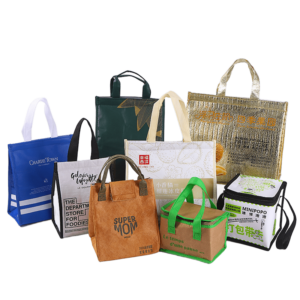
Achieving consistent, vibrant prints on canvas bags is a challenge that requires technical attention and careful workflow management. This article shares eight essential tips for managing color consistency in canvas bag printing, ensuring your brand stands out with high-quality, professional results.
8 Tips to Manage Color Consistency in Canvas Bag Printing

To manage color consistency in canvas bag printing, control moisture, test on similar fabrics, choose the right ink, and fine-tune screen printing techniques to ensure uniform and vibrant results.
Keep reading to learn the practical steps that will help you avoid costly printing mistakes and achieve quality results with every batch.
Pre-treat Canvas Bags by Removing Moisture and Lint

Removing moisture and lint from canvas before printing ensures better ink adhesion and prevents patchy or faded prints. Pre-treating the canvas stabilizes its surface for consistent results.
Why Moisture and Lint Matter
Moisture in canvas can cause ink to spread unevenly. Lint particles create bumps, leading to incomplete or broken prints. These factors cause color inconsistencies and lower the quality of the final product.
How to Pre-treat
| Step | Action |
|---|---|
| Drying | Use a heat press, dryer, or oven at low temperature |
| Lint Removal | Use lint rollers or air blowers |
| Timing | Pre-treat 1–2 hours before printing |
Taking the time to dry and clean your canvas bags helps ensure that your prints will be bright, even, and durable.
Iron or Steam the Canvas Before Printing

Ironing or steaming flattens the canvas surface, ensuring smoother ink application and reducing defects caused by fabric wrinkles.
Prevent Uneven Ink Coverage
Wrinkled fabric does not absorb ink evenly. Some areas may receive more ink than others, resulting in streaks, shadows, or patchy color. Steaming or ironing the canvas removes these physical distortions.
Recommended Tools
| Tool | Benefit |
|---|---|
| Steam Iron | Softens canvas and smooths out folds |
| Heat Press | Provides even pressure and heat |
| Garment Steamer | Gentle on fabric and efficient |
Preparing a smooth surface is a small step that makes a big difference in maintaining print quality and visual appeal.
Conduct Test Prints on Similar Fabric
Test prints help identify and resolve ink, alignment, and color issues before committing to the final print run.
Benefits of Test Printing
Test printing allows you to adjust ink thickness, color tones, and registration. It ensures you understand how your design behaves on a canvas surface, reducing waste and saving time.
Best Practices
| Item | Suggestion |
|---|---|
| Test Fabric | Use scrap canvas from the same supplier |
| Ink Adjustment | Modify flow and opacity as needed |
| Alignment Check | Confirm screen registration for multi-color prints |
A few test runs on similar material will greatly reduce errors in bulk printing.
Use Proper Ink Types for Canvas

Using inks suited for canvas is essential for vibrant color and long-lasting results. Not all inks work well with thick or absorbent fabric.
Choosing the Right Ink
Canvas printing typically requires plastisol for its brightness or discharge ink for a softer feel. Each ink behaves differently under heat and on textured surfaces.
Ink Comparison Table
| Ink Type | Features | Suitability |
|---|---|---|
| Plastisol | Vibrant, sits on fabric surface | High-opacity logos |
| Water-Based | Soaks in, soft hand feel | Lightweight prints |
| Discharge Ink | Removes dye, vintage look | Dark fabrics |
Choosing the right ink affects the way colors appear and stay on your canvas bags.
Control Ink Mixing and Consistency

Even small ink inconsistencies can lead to uneven colors. Proper mixing and viscosity control ensure that the ink behaves uniformly.
Maintaining Ink Quality
Unmixed pigments settle and cause variations in tone. Over-thick ink doesn’t flow well, while overly thin ink spreads and reduces sharpness. Use reducers or extenders to achieve the right balance.
Ink Mixing Guidelines
| Task | Tools Needed | Purpose |
|---|---|---|
| Stir Thoroughly | Spatula, mixing drill | Blend pigments evenly |
| Add Extender | Ink reducer | Improve flow, reduce opacity |
| Consistency Check | Test swatch | Check drying and color match |
Inconsistent ink will directly affect the final look of your printed canvas bags.
Maintain Correct Screen Printing Parameters
Correct mesh count, pressure, and stroke speed are essential for distributing ink evenly and maintaining color uniformity.
Ideal Parameters for Canvas
Canvas has a rough texture and absorbs ink quickly. A mesh count of 110 to 160 balances detail and ink flow. Too low and the design may bleed. Too high and ink may not pass through.
Recommended Settings
| Parameter | Ideal Range | Effect |
|---|---|---|
| Mesh Count | 110–160 | Balanced ink flow |
| Squeegee Angle | 45 degrees | Even pressure application |
| Stroke Speed | Moderate | Uniform ink deposit |
Optimizing these settings prevents color bleeding, ghosting, or patchy coverage.
Cure Ink Properly After Printing

Curing fixes the ink onto the fabric and stabilizes the color. Skipping or under-curing leads to fading, smudging, and poor durability.
Correct Curing Process
Plastisol inks typically cure at 150–170°C for 3–5 minutes. Use flash dryers or conveyor dryers to ensure even heat distribution across the canvas bag surface.
Temperature Guide
| Ink Type | Temperature (°C) | Time (Minutes) |
|---|---|---|
| Plastisol | 160 | 3–5 |
| Water-Based | 150–170 | 3–6 |
| Discharge | 170 | 5 |
Proper curing ensures the ink bonds with the fabric and the colors remain vibrant after washing or exposure.
Use Registration Marks for Multi-Color Prints

Registration marks ensure alignment of multi-color designs. Poor registration leads to overlaps, gaps, or misaligned colors that affect the quality of the final print.
Role of Registration
Each screen holds a different color. If they shift even slightly, the result looks blurred or off-center. Marks help align screens precisely before printing.
Steps for Proper Alignment
| Step | Action |
|---|---|
| Use Guides | Add crosshairs or corners to your design |
| Adjust Screens | Align screens with the marks manually |
| Double Check | Do a single color pass to verify fit |
Precision in multi-color prints defines the professionalism of the product.
Conclusion
Managing color consistency in canvas bag printing takes careful planning, right materials, and accurate techniques. From pretreating fabric to curing ink correctly, every step influences the final look. At JiaRong Packing, we implement all these measures to ensure our canvas bags meet the highest standards in quality and appearance.
If you're a distributor or retailer looking for customized, vibrant canvas bags, we invite you to explore our product line and share your feedback or questions in the comments below!