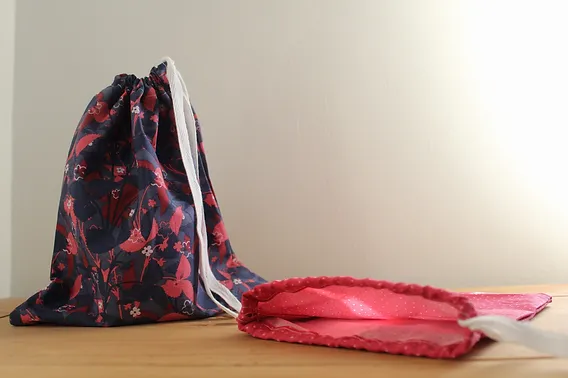
Making your own drawstring bag is easier than you might think. Whether you want to create a stylish, reusable bag or need a quick gift idea, a drawstring bag is a great option. So, how exactly do you sew one? Let's break it down step-by-step.
Sewing a drawstring bag is a simple DIY project. With just a few materials and basic sewing skills, you can make a functional and stylish bag.
Many crafters, both beginners and seasoned, have embraced the joy of making their own drawstring bags. But are they really easy to make? What’s the best method for sewing the drawstring? And how long will it take? Let's find out.
Are Drawstring Bags Easy to Make?

Drawstring bags are among the easiest and most beginner-friendly sewing projects. With basic materials and a straightforward pattern, almost anyone can make one. But how exactly can you make them so quickly?
Yes, drawstring bags are easy to make1. The design is simple, requiring only [basic sewing skills and materials](What basic materials are required to make a drawstring bag?)2, making them perfect for beginners.
Simple Materials, Simple Process
The simplicity of the design makes these bags a fantastic project for sewing novices. You will need fabric (like cotton or canvas), a sewing machine or needle, thread, a drawstring (cord or ribbon), and pins for easy assembly. The step-by-step process involves cutting fabric, sewing the sides together, creating a casing for the drawstring, and adding the drawstring itself.
Here is a basic process:
- Cut your fabric to the desired size.
- Fold and sew the top edge to create the drawstring casing.
- Sew the side seams together.
- Insert the drawstring.
| Material Needed | Purpose |
|---|---|
| Fabric (Cotton, Canvas) | Main body of the bag |
| Drawstring (Cord/Ribbon) | Used to close and carry the bag |
| Thread | For sewing the fabric pieces together |
| Needle or Sewing Machine | To sew the fabric |
How Do You Sew a Drawstring?
Sewing the drawstring3 can be tricky if you’re new to it. But with the right technique, it’s straightforward. Here's a guide.
Sewing a drawstring is simple. Once you’ve created the casing, thread the cord through, tie a knot, and your bag is ready to use.
Creating the Drawstring Casing
Once you’ve cut your fabric and sewn the sides, the next step is creating the casing4. To do this:
- Fold the top edge of the fabric about 1 inch inward and sew along the edge, leaving a small opening.
- Use a safety pin or bodkin to thread the drawstring through the casing.
- Once the drawstring is in place, tie knots at both ends to prevent it from slipping out.
Alternative Drawstring Methods
If you don’t have a cord, you can also use ribbon, rope, or fabric strips as a drawstring alternative. Make sure it’s durable and easy to pull through the casing.
How Long Does It Take to Make a Drawstring Bag?
The beauty of a drawstring bag5 lies in how quickly you can create one. How much time should you expect to spend on this project?
Making a drawstring bag typically takes 30 minutes to an hour, depending on your skill level and the materials used.
Time Estimate for Beginners vs. Experts
For beginners, expect to spend about 1 hour on this project. This time includes measuring, cutting, and sewing. Experienced sewers may finish the project in just 30 minutes. If you’re making multiple bags, you can batch the steps to save time.
| Skill Level | Time Estimate |
|---|---|
| Beginner | Around 1 hour |
| Experienced | 30 minutes or less |
How to Make a Drawstring Bag from a Pillowcase?
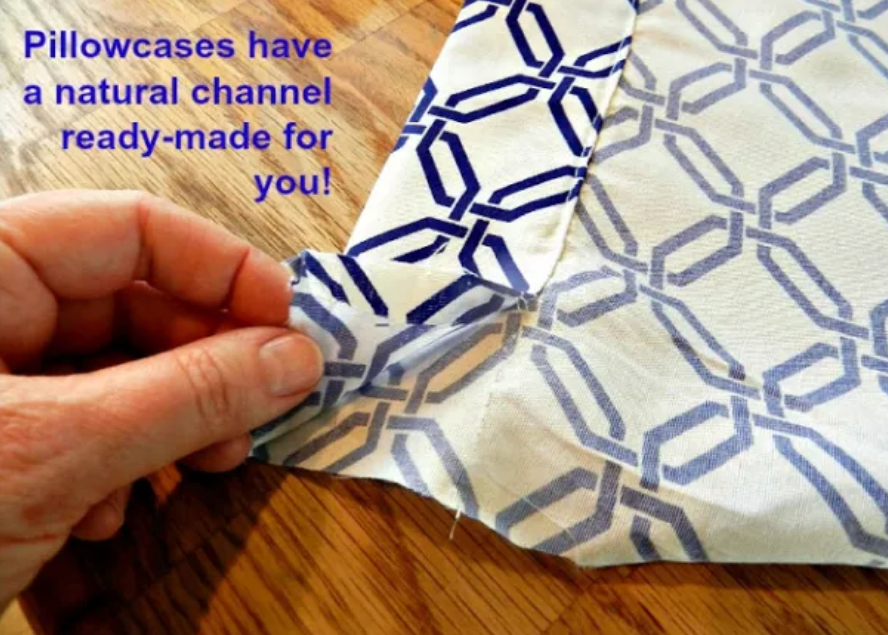
If you don’t have fabric, you can easily repurpose an old pillowcase to create a drawstring bag. This is an excellent way to upcycle materials and create something functional.
You can make a drawstring bag from a pillowcase by cutting, folding, and sewing the fabric. It's an eco-friendly way to recycle materials.
Repurposing a Pillowcase
- Cut the pillowcase to your desired bag size.
- Fold the top edge down about 1 inch and sew it to create the drawstring casing.
- Sew the sides of the pillowcase to form the body of the bag.
- Thread a cord or ribbon through the casing, and tie it off.
Using a pillowcase is not only environmentally friendly, but it also provides a unique, textured bag that you can customize with fabric paint or embroidery.
| Step | Action |
|---|---|
| Cutting the Pillowcase | Cut to size, depending on bag needs |
| Folding and Sewing the Casing | Create a fold for the drawstring |
| Inserting the Drawstring | Use cord or fabric strips |
Conclusion
Making a drawstring bag is an enjoyable, beginner-friendly project that you can complete in under an hour. Whether you’re using fabric you have lying around or upcycling an old pillowcase, you’ll end up with a practical and eco-friendly bag. At JiaRong Packing, we specialize in custom drawstring bags for businesses. If you’re looking for quality and customization, check out our collection on https://zjjrpackaging.com. We offer bulk orders for businesses, with a focus on premium quality and fast delivery.
-
Learn why drawstring bags are a popular choice for beginner sewing projects. ↩
-
Discover the simple materials and steps involved in making a drawstring bag. ↩
-
Learn the simple steps to sewing a drawstring and creating the perfect bag. ↩
-
Find out how to create a casing that holds the drawstring securely in place. ↩
-
Learn how much time beginners and experts need to make a drawstring bag. ↩


